Start selling on Amazon UAE
Step by step guide to get started selling on Amazon UAE no matter where you live. Let's get started.
In this blog post, I'm going to give you five steps that you need to follow in order to get started selling on Amazon.
Step 1: Start and Register Your Seller Account
Just like an Amazon customer account, you need to have an Amazon seller account.
Now don't worry, I have a full-length tutorial if you are interested in starting selling on Amazon in the Middle East, specifically Amazon UAE and KSA. You'll find all of the information in this video, which I will leave linked in the description box. You can follow the step-by-step guide to learn how to get started. But just briefly, here are the documents that you will require to register as a seller:
Identity Proof: National ID or Passport
Business Information: Trade License (if applicable), Bank Account Numbers
Contact Information: Phone Number, Email Address
Once you apply, Amazon will take about three to five business days to register your seller account. They might also conduct a short interview, like a video call, to verify your identity.
“The whole purpose of this seller account registration is just so that Amazon can validate that you are who you say you are and you are registering as a real seller.”
If you're wondering which Amazon Marketplace you're eligible to sell in, the good news is Amazon has a global marketplace. This means if you're eligible, you can sell in any of Amazon's global markets. However, it's generally easier to start selling in your local market.
Why start locally?Selling cross-border into a completely different continent or country comes with its own challenges. Cross-border eCommerce is not as simple as local eCommerce. Therefore, I would highly recommend getting started in the marketplace closest to you, such as Amazon UAE or Saudi if you reside in the Middle East.
Step 2: Access Amazon Seller Central
Once your Amazon account is registered, you will have access to Amazon Seller Central. This is the back-end dashboard that Amazon sellers use.
Types of Dashboards:
Amazon Seller App: Useful for updates like how many units you're selling and revenue generation. However, it can be a bit glitchy.
Amazon Seller Central (Desktop Version): Your command center for inventory, cataloging products, and following up with reports and sales.
Enhancing Your Seller Central Experience
Did you know you could actually find us inside Amazon Seller Central as well? Here's how you do it:
Click on the three-line menu.
Go down to Apps and Services.
Click Explore Services.
Select the type of service you're looking for.
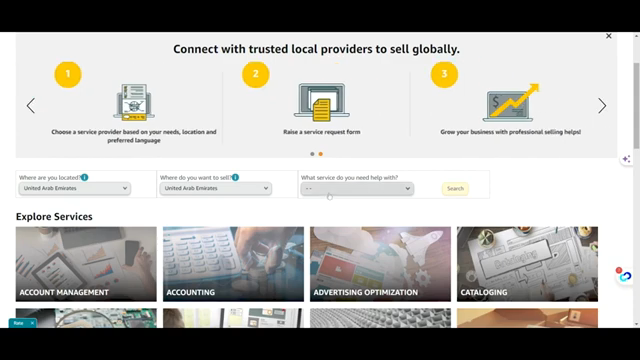
Once in, search for us, go into our profile, and simply click on Contact Provider. This way, you can communicate with us easily and we can assist you better.
Step 3: Adding Products
Now that you have access to your Amazon Seller Central, it's time to get started with selling. You need to add products to your Amazon account, and there are two ways to do this:
Create a Brand New Listing: For a new product that is not currently in Amazon's catalog.
Sell an Existing Product: Become a reseller of a product already listed in Amazon's catalog.
Pros and Cons:
Creating a brand new listing provides you full control over that product from a marketing and sales perspective.
Selling a product that already exists in the catalog, on the other hand, allows you to be a reseller, offering a quicker route to market. However, reselling isn't as easy as it sounds due to Amazon's strict rules and guidelines. Make sure you're compliant to avoid having your account suspended.
Step 4: Fulfillment
Once your products are added, it’s time to focus on fulfillment. You basically have two ways to deliver the products to Amazon customers:
Amazon FBA (Fulfillment by Amazon)
Amazon FBM (Fulfillment by Merchant)
Amazon FBA:
FBA is one of the best logistics systems created. It reduces the time you have to spend on fulfilling and delivering products. The process is simple:
Send your inventory in bulk to Amazon's warehouses.
Amazon will take care of the picking, packing, and delivering of the products.
Amazon also handles customer service for you.
Advantages of FBA:
Prime Eligibility: Your product is eligible for Amazon Prime, meaning customers can get the product free of shipping charges.
Quick Delivery: Same day or next day delivery.
Amazon FBM:
If you choose FBM, you or whichever company you're working with will handle the picking, packing, and delivery.
Advantages of FBM:
Cost: Less expensive than FBA.
Control: More control over the shipping process.
Flexibility: Particularly useful for fragile, large, or oversized products.
Disadvantages:
More Effort: Requires more effort on your part to ensure timely fulfillment.
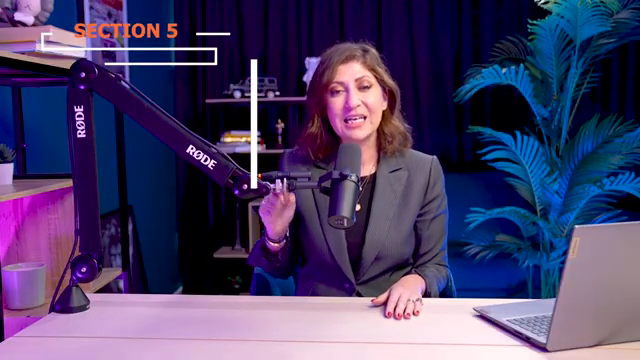
Step 5: Launching Your Product with Ads
Now that you've decided on your fulfillment method, it’s time to launch your product. This usually involves advertising.
Why ads?
Amazon is a popular marketplace, and while it does offer organic discoverability, ads can significantly boost your product's visibility.
Discoverability --> Visibility --> Purchase
Ads increase the number of people who can see your product. Given the limited time consumers spend on Amazon (between three to six minutes on average), effective ads make your product visible to potential buyers.
Amazon Ads Simplified:
Keyword Advertising: Target specific keywords that customers are searching for.
Phrases: Utilize different search phrases to capture a wider audience.
Video Ads: Create engaging video ads for higher engagement.
“*****Amazon ads may appear complicated, but they are a simplified system designed to increase visibility and sales.”
Conclusion
This is it: a quick step-by-step guide on how to start selling on Amazon. Remember to watch our other videos and reach out to us. Check out our master class to learn more about selling on Amazon. All the details can be found in the description box of this post.
Thank you for reading, and we'll see you in the next post with more information!
Looking for more detailed guidance? Check out our full-length tutorial on Amazon UAE and KSA here.
